
How to Color Online Professionally for Beginners
How to Color Online Professionally for Beginners

How to Color Online Professionally for Beginners
Coloring is no longer just crayons and paper—it’s a vibrant world of creativity, expression, and skill. Whether you’re 8 or 80, mastering online coloring brings new possibilities right into your browser or tablet. In this guide, we’ll walk you through how to approach professional-level coloring of digital pages, step-by-step, with a friendly tone and the heart of “Cốm Phố Xưa” — welcoming, simple, and full of gentle encouragement.
What Does “Professional” Mean in the Context of Coloring?
When you hear professional coloring pages, you might picture rich shading, clean edges, smooth gradients, and a finished piece you’re proud to show. In the online environment, that means:
-
using digital tools or apps to color without spilling or smudging,
-
choosing palettes thoughtfully,
-
applying techniques like layering, blending, adding highlights/shadows,
-
and exporting/sharing your finished work confidently.
Many online tutorials show how to elevate basic coloring into something that looks polished and refined.
So when we talk about professional coloring pages and doing online coloring professionally, we’re aiming for results that go beyond “fun scribbles” into “wow, I made that” territory.
Why Choose Online Coloring?
There are many benefits to shifting from print-and-crayon into the digital world:
-
Flexibility: You can undo, change colors easily, zoom in for detail—no messy cleanup.
-
Tool variety: Layers, brushes, blending tools, etc. Many free or inexpensive apps exist.
-
Sharing & saving: Your creations stay crisp, you can share them as digital files or prints.
-
Skill growth: You’ll learn techniques that transfer into traditional art too.
For beginners wanting to create “serious” looking results, online coloring is an excellent path.
Setting Up Your Workspace for Online Coloring
Before you jump in, let’s get your digital area ready.
Choose the right app or platform
-
Look for software with layers (so you can work under/over lines).
-
If you use a browser-based tool, make sure it supports upload of line art and coloring beneath the lines.
-
Consider if you’re using a tablet with stylus or a computer with mouse—stylus gives finer control.
Prepare your file
-
Download or import a line art page: one you like, with good contrast.
-
Create a blank layer beneath the line art layer. Set the line art layer to “Multiply” (so you color under the lines and they stay visible) if your app supports it.
-
Name your layers clearly: “Base colors”, “Shadows”, “Highlights”, etc. This keeps you organized.
Palette and swatches
-
Decide your color palette first (3-5 main colors + neutrals). Planning ahead prevents random mismatches.
-
Create swatches so you know exactly what you’ll be using.
Step-by-Step: Professional Approach to Coloring Online
Here’s a detailed path from blank canvas to polished finish—ideal for beginners.
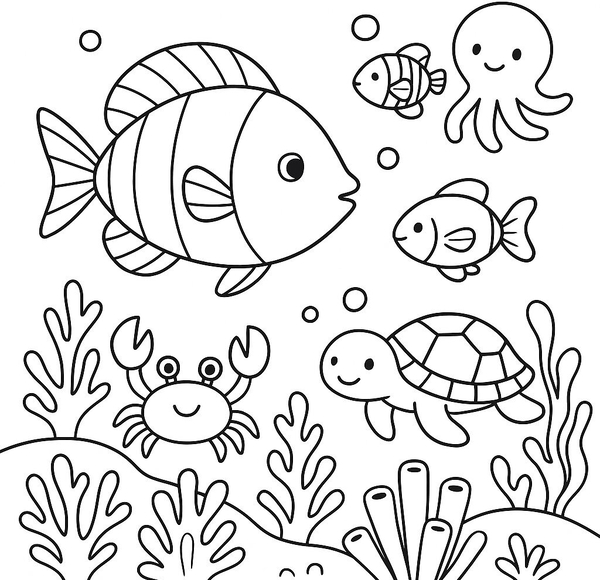
1 Choose a Suitable Coloring Page
Begin with something manageable: large open areas, clear outlines, not too many tiny details. Over time you’ll move into more complexity.
Pick something you enjoy—nature scene, cartoon style, mandala, or whatever inspires you.
2 Lay Down Flat Colors (Base Layer)
-
On your “Base colors” layer, fill each section with your chosen flat color.
-
Don’t worry about shading yet — just get the areas filled cleanly.
-
Use tools like bucket fill or brush with solid fill, depending on the app.
3 Add Shadows and Highlights (Depth & Dimension)
-
Create a new layer labeled “Shadows” above your base layer. Use a slightly darker tone of your base color and apply subtle shadows where light would naturally fall away.
-
Create another layer “Highlights” and add the lightest tones or even white for shining spots.
-
Use blending tools or lower opacity brushes to soften the transitions. See tutorials on shading and blending.
4 Use Blending and Layering Techniques
-
Layering: build color gradually from a light hand to darker tones.
-
Blending: smooth the transitions between shadows and base or base and highlight.
-
Experiment with textures for surfaces (fur, wood, metal) by changing brush types or stroke directions.
5 Fine Details and Clean-Up
-
Zoom in and refine edges. Clean up any color spill beyond outlines.
-
Add small details: sparkle, tiny highlights, texture marks. These give “professional” polish.
-
If your app supports it, use a white pen or brush on a new layer for crisp highlights.
6 Final Touches and Exporting
-
Make a “Final” layer if you want to add signatures or watermark.
-
Flatten/merge layers if needed but keep a version with layers saved (so you can revisit).
-
Export in the format you need (PNG for web, JPG for printing, etc.).
-
Save a high-resolution version if you plan to print or share.
Choosing the Right Coloring Pages for Online Work
Not all coloring pages are created equal. For your journey into professional coloring pages, keep these in mind:
-
Look for clean, crisp line art without smudged or faint outlines.
-
Choose a theme you love (you’ll enjoy working longer).
-
Consider complexity: for early practice pick simpler pages; later try intricate ones.
-
For online coloring, ensure it’s high enough resolution (so zooming in won’t pixelate).
Several guides recommend selecting pages that match your current skill level and interest.
Tool & Material Tips (Even for Digital!)
Even though you’re working online, many “tool” principles from traditional coloring still apply.
-
Use a stylus (if you have a tablet) for precision vs a mouse.
-
If using a touch screen, ensure your touch sensitivity is comfortable.
-
For tablet apps: adjust brush size, opacity, flow for best results.
-
Use layers generously—each major element (base, shadow, highlight, texture) gets its own layer.
-
Keep your “undo” handy—but also try making fewer mistakes by slowing down.
-
Stay organized: name your layers, keep palette swatches, back up your work.
Common Mistakes Beginners Make & How to Avoid Them
Here are frequent pitfalls and quick remedies:
-
Over-pressing/over-painting: pushing too many colors too fast can muddy the look. Instead, layer gently and build gradually.
-
Ignoring the light source: if you don’t decide where light comes from, shadows and highlights look inconsistent.
-
Using too many random colors: a chaotic palette distracts. Stick to a planned scheme.
-
Skipping clean-up: stray bits of color beyond lines make the piece look unfinished.
-
Rushing to finish: take your time—it’s about the process as much as the result.
Building Your Confidence & Next Steps
Coloring online professionally is a skill that improves with practice. Here’s how to progress:
-
Set a regular coloring practice schedule (e.g., 15–30 minutes a day).
-
Revisit older pages and try “re-coloring” them with new techniques you’ve learned.
-
Join an online coloring community: share your work, get feedback, learn from others.
-
Challenge yourself with more complex pages (smaller areas, more color variation).
-
Experiment with different styles: flat color, semi-realistic shading, stylized texture.
FAQ – Frequently Asked Questions
Q1: What software or app can I use for online coloring?
A: There are many free and paid options. Look for features like layers, brushes, layer modes (multiply, overlay). Even browser-based tools or tablets work well.
Q2: Do I need expensive tools to get professional results?
A: Not necessarily. Skill, technique, and practice matter more than price. Good results can come from basic tools + careful work.
Q3: How can I choose a good color palette for my page?
A: Start with 3–5 core colors, choose complementary or analogous hues, consider mood (warm vs cool). Planning ahead helps coherence.
Q4: How do I know where to put shadows and highlights?
A: Decide on a light source (top-left, top-right, etc.). Areas farther from the light are darker (shadow), closest are lighter (highlight). Visualize simple 3D objects.
Q5: What if I make a mistake—can I fix it online easily?
A: Yes! Use layers to isolate sections, use undo or erase on separate layers so you don’t damage your base work. That’s the advantage of online coloring.
Conclusion
Embarking on your journey of online coloring is like stepping into a cozy, creative studio where every stroke matters—and every decision you make brings you closer to artwork you’ll be proud of. With the right setup, careful planning, and gentle practice, you’ll be handling professional coloring pages like a seasoned artist—maybe sooner than you think.
In 2026, the tools are more accessible than ever, the communities more supportive, and the possibilities for your art more exciting. So pick a page you love, choose your palette, and let your colors tell your story. Keep nurturing your craft, enjoy the process, and one day you’ll look back and say: “Yes — I learned how to color online professionally.”
Thank you for reading, and remember: every blank page is a chance to shine. Grab your virtual brush, step into your creative space, and make something beautiful today.


AAdministratorAdministrator
Welcome, honored guests. Please leave a comment, we will respond soon